Installing Adura Max waterproof flooring is a “snap”! Kitchens spills happen all the time and Bathrooms are wet and humid places, right? Right. So, using a waterproof floor of some kind is essential. Tile and linoleum were the only choices for waterproof flooring for years. People have made the mistake of using laminate or wooden floors in these two rooms only to watch them swell up and warp as the water soaked in. Not with Adura Max waterproof collection of plank flooring. American Carpet Wholesalers carries all Adura Max collection styles from Acacia, Aspen, Dockside, Lakeview, Margate, Meridian, Napa, Sausalito, Seaport, and Sundance.
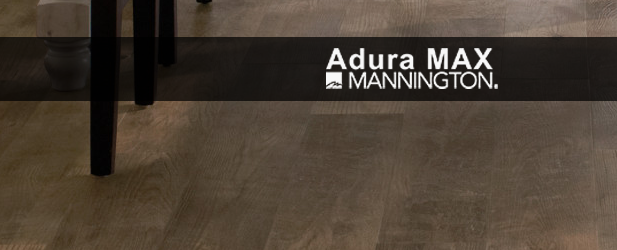
Mannington Adura Max LVP at American Carpet Wholesalers
Over recent years there has been an explosion in the numbers of different flooring options you now have such as waterproof laminate flooring, vinyl laminate planks, and stick on laminate flooring to name just a few. With each having its own different type of installation process – some use snap together and locking joints and some can simply be glued down.
In this article, we will look at the snap together type laminate planks like the Adura Max waterproof flooring. Before installing Adura Max waterproof flooring please check the manufacturers instructions for your flooring and in particular, how the joints are snapped together as the methods involved may be slightly different to those described below as if any of the joints are not snapped together correctly or are damaged then this may affect the waterproof abilities of the flooring.
As with most waterproof laminate flooring the Adura Max planks themselves are not designed to be submerged at any time, only to resist water from the top. You need to ensure that your subfloor is 100% dry before you lay the Adura Max planks. If your subfloor is new concrete you should allow it to cure for at least 60 days before installing Adura Max waterproof flooring.
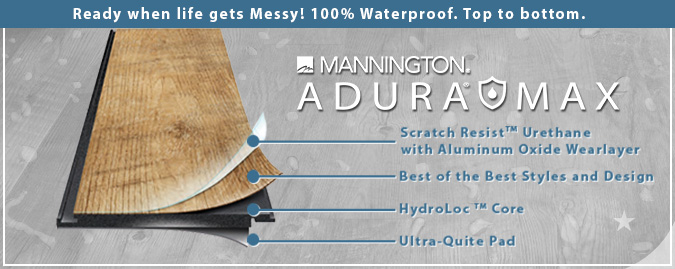
Adura Max Waterproof Flooring by Mannington at American Carpet Wholesalers
Fitting the Adura Max waterproof flooring
Please note that this is only a section of the installation guide for installation. For the actual Mannington Adura Max waterproof flooring installation guide click here.
1. It is important to balance the layout of the plank format. Proper planning and layout will prevent narrow plank widths at wall junctures. Determine layout to prevent having less than half a plank width or very short length pieces.
2. As with all plank products, lay the long dimension of the plank parallel to the long dimension of the work area.
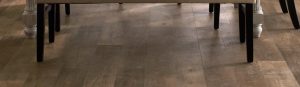
Adura Tile Sausalito Adura Max Waterproof Laminate Flooring
3. Accurately measure the room to determine the center line, adjust this established line to accommodate a balanced layout and then transpose this line to a comfortable width away from the starting wall (approximately 2’ to 3’ wide). Determine if the starter row will need to be cut. If the first row of planks does not need to be trimmed in width, it may be necessary to cut off the unsupported tongue so a clean, solid edge is toward the wall.
4. Position the first plank so that both the head and side seam groove are exposed. NOTE: The groove is the longer of the locking profile approximately 1/4”. This requires installing the product from left to right in the room. Occasionally, it may be necessary to install “backward”. This may be done by sliding the grooves under the tongues and working them right to left, but this is more difficult.
5. Install the second plank in the row by angling the end tongue into the end groove of the first plank. Be careful not to bend the corner of the plank. It is important to know that all structures expand and contract as well as hardwood and laminate product, for this reason, it is recommended to maintain an expansion gap of approximately 1/4” from the wall. Then cut a plank to length to start the second row. Stagger the end seam at least 6” to 8” from the first plank.
6. Install the first plank in the second row by inserting the long side tongue into the groove of the plank in the first row. This is best done with a low angle of the plank. Do not flat install Adura Max waterproof flooring planks.
7. Install the second plank in the second row by inserting the short end tongue tightly into the previously installed plank end groove. Align the plank so the long side tongue tip is positioned just over the groove lip of the plank in the first row. Working from the end seam, with a low angle, slide the long tongue into the groove of the adjoining plank. Finesse and slight pressure is required to seat the tongue into the groove. You will feel the tongue lock into the groove.
8. Work across the length of the room installing planks along the wall in the first row and then aligning the planks in the second row. It is critical to keep these two rows straight and square, as they are the “foundation” for the rest of the installation. Check squareness and straightness often.

Adura Tile Sundance Adura Max Adura Max
9. Cut the last plank in the first row to fit approximately 1/4” short of the end wall. Planks may be cut with a saw or guillotine type cutter such as Bullet Tools Mega shears. Often times the remainder of this plank may be used to start the third row.
10. Continue installing planks, being certain to maintain a random appearance and offset end seams by at least 6” to 8”. Maintain a 1/4” expansion space at all fixed vertical surfaces. Check to be certain all planks are fully engaged, if slight gapping is noticed, the gap can be tapped closed by using a scrap of flooring and a tapping block. It is always a best work practice to use a Mannington laminate. tapping block to lightly tap rows as you install to fully seat the locking system assuring they are fully engaged.
11. When fitting under door casings, toe kick etc. plank must be modified. using a small block plane. Remove a thin layer from the groove to allow tongue and groove to be flat fitted while keeping the integrity of the tongue and groove. After checking the fit apply a thin bead of MSS 20 seam sealer on the groove then slide planks together to seal the joint tight. Wipe any excess sealer off the surface. If necessary a flat pull bar may be used to assist in adjoining the modified planks. When fitting around obstacles or into irregular spaces, Adura Max waterproof flooring can be cut easily and cleanly using a multi-tool or jigsaw. It is often beneficial to make a cardboard template of the area and transfer this pattern to the plank.
Continue to the end making sure you keep the spacers in place and follow any diagrams provided by Mannington. Each carton of the flooring contains planks measuring 6 inches x 48 inches each at a thickness of 8mm. Each carton covers 27.39 square feet.
Sealing the Edges
The jointing systems supplied with your flooring will once snapped together, provide a sealed joint that will prevent any water penetrating the surface and getting below to blow and rot the softer underbelly.
When the floor is laid it is time to cover the 1/4 inch expansion joint you have left around the perimeter of the floor. You will have to ensure that this joint is also sealed to prevent water seepage. Use a suitable sealer such as a silicone based kitchen or bathroom sealer.
American Carpet Wholesalers is your source for great knowledge regarding installing Adura Max waterproof flooring! When you call and speak with a flooring expert at 800-548-2706, let them know what products you want samples and pricing information for. Mannington does not allow online retailers to display best pricing information online. However, one quick call or chat with an American Carpet Wholesaler flooring expert will make you very happy that you took the time to contact them.
Click here for more reviews of the Laminate Flooring products available at American Carpet Wholesalers or Click here to explore other styles of flooring. For more on American Carpet Wholesalers check out the customer submitted reviews on Reseller Ratings.